60% Off Hurry up! Sale ends in :

Days
Hours
Min
Sec

Custom Search TablePress Plugin: How to Add Powerful Filtering in WordPress (No Code)

Introduction

If you use TablePress to display data in WordPress, you already know how powerful it is. But what if you want more control over how users search your tables—like filtering by specific columns or hiding the table until they search?

A custom search TablePress plugin can dramatically improve how users interact with large data tables on your WordPress site. While TablePress is powerful on its own, it lacks advanced search features like filtering specific columns or hiding content until a user enters a search term. In this guide, you’ll learn how to enhance TablePress with CSTP — a no-code solution that brings precision search and a cleaner interface to your tables.

In this tutorial, we’ll show you how to easily enhance TablePress using CSTP (Custom Search in TablePress)—a lightweight add-on that brings advanced search features to your tables without touching a single line of code.

Build your Table
To get started, you need to create a table using the TablePress plugin. If you are new to TablePress.
Direction Arrows
Step 1
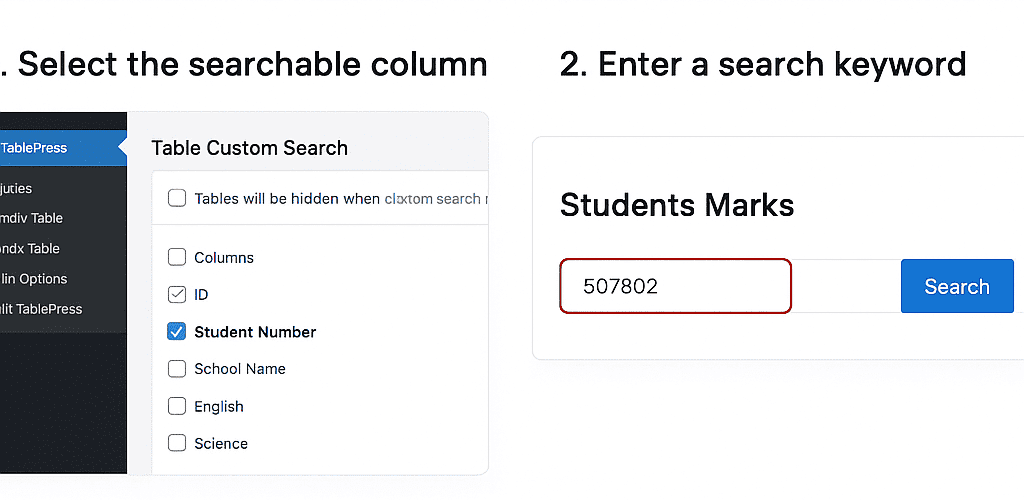
Select Searchable Columns , Hide Table Until Search
In the CSTP section. Enable custom search. Click on this option to enable the search feature.
Direction Arrows
Step 2
Users Search, You Deliver Clean Results
Tick the checkbox next to the columns that you want to be searchable. For example, you might want visitors to be able to search by name or email.
Step3

What You Need

Why Use CSTP?

Here’s what CSTP adds to your TablePress experience:

  • 🎯 Hide entire tables by default

  • 🔍 Let users search only selected columns (like ID, Name, Email)

  • ⚡ Display only relevant rows on keyword match

  • 🧩 Fully integrated with TablePress UI — no custom setup needed

Step-by-Step: How to Add Custom Search

Step 1: Install and Activate TablePress

Go to Plugins → Add New, search for TablePress, and click Install NowActivate.

Step 2: Install CSTP Plugin

Install your CSTP plugin (upload the .zip file or install from the marketplace). Once activated, CSTP will automatically detect your TablePress setup.

Step 3: Configure Custom Search Settings
  • Navigate to your TablePress table

  • Click “Enable Custom Search”

  • Select the columns you want to be searchable (e.g., Student Number or ID)

  • Optionally enable “Hide Table Until Search”

Step 4: Save and Preview

Save changes, and preview your table. Now only matching rows will appear when users search based on your selected columns.

Live Preview or Demo

👉 Click here to see a live demo of CSTP in action

Pro Tips for Better UX

  • Use clear placeholder text like “Enter Student ID”

  • Add a help tooltip near the search field

  • Combine CSTP with pagination for even smoother browsing

Conclusion

Adding custom search to TablePress doesn’t have to be complicated. With the CSTP plugin, you get advanced filtering, clean tables, and better user experience—all with just a few clicks. No code, no hassle—just better data interaction.

Join +7800 Happy Customers Today!

🎁 Get CSTP Today

Stop making your users dig through data. Help them find what they need—instantly.

Table of Contents

Get Tips & Tricks, Updates, Fresh Blogs & Offers.