

To add a new Content Notify subscription form, you can either create one manually using the Form Shortcode, or you can use the Form Builder. The preferred method is using the Form Builder as it provides greater functionality, such as:
- Use more than one form on the same page.
- Use the form in a pop-up or modal.
- Submit the form without reloading the page.
Form Builder #
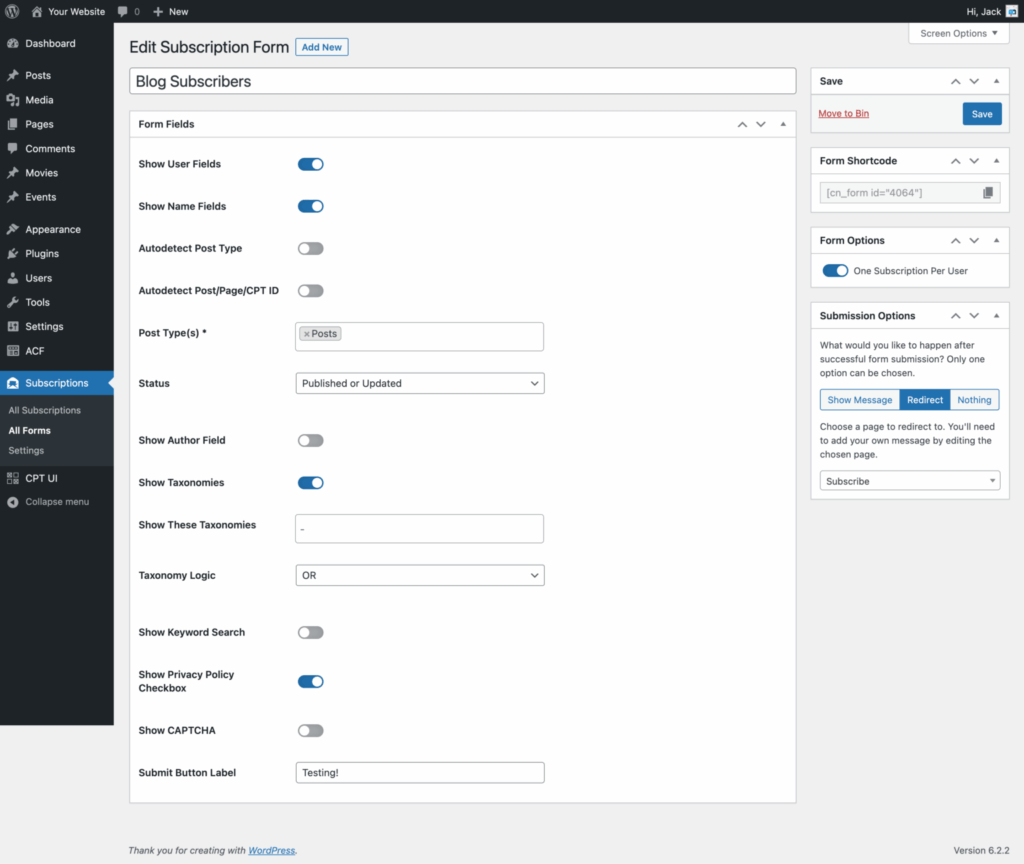
Content Notify comes with a simple form builder to allow you to construct complex subscription forms with ease. It allows you to enable or disable all fields, set them manually, and tell the form what you want to happen after submission. Please note: Some fields may still show, even if set not to, depending on if the user is logged in or not, such as the email address field.
Form Builder Sections #
Form Fields #
This section of the form builder shows all the fields that you can enable and disable. Some fields, such as the ‘Autodetect Post Type’ option will hide/show other fields depending on what’s been selected.
Form Shortcode #
Once the form has been saved, a shortcode will be generated and shown in the ‘Form Shortcode’ metabox on the right of the Form Builder. This can then be copied (by clicking the icon on the right of the shortcode) and pasted anywhere you want the form to show on your site, such as a page, sidebar, or pop-up.
Form Options #
- Selecting the ‘One Subscription Per User’ option in this metabox will allow only a single subscription for each unique email address to be created for this form.
- Selecting the ‘Create User with Subscription’ option in this metabox will allow users to be created, using their email address, first name, and last name, at the time they verify (not create) their subscriptions. The person creating the subscription must be logged out at the time the subscription is created in order for a user to be registered. The standard ‘new user registration’ email will be sent by WordPress. This can be overriden using a plugin, such as Better Notifications for WP (the sister plugin to Content Notify).
Submission Options #
This metabox allows you to choose what you’d like to happen after the form has been successfully submitted.
- The default is ‘Show Message’, which can be customised with a message of your choosing.
- The second option is ‘Redirect’ which allows you to choose any Page where you want to redirect after form submission. You’ll need to include your own message on that page if using this option.
- The last option is ‘Nothing’, which might sound unhelpful but actually allows for some really interesting scenarios. When this option is chosen, the form will disappear after submission and will leave behind a new CSS class of
.cn-form-submittedon the form container for styling or using in javascript.
Form Info #
This metabox shows a button labelled ‘View Subscribers’. When clicked, it will take you to the All Subscription screen and show any subscribers who have created a subscription using this form.
Link to Edit Form in WP Admin Bar #
If a single Content Notify subscription form, built using the form builder, is present on a page, a handy link will show in the WP Admin Bar at the top of the screen when logged in that provides a direct link to editing that form.
For more information on each part of the form builder and how it works, please see the ‘Shortcode Parameters’ section further down this page.
Form Shortcode #
Content Notify comes with a shortcode that can be added anywhere to show the ‘Create Subscription’ form.
You can only use the shortcode from the plugin to add a Subscription form and cannot use another plugin to create a subscription form for Content Notify, e.g. Gravity Forms.
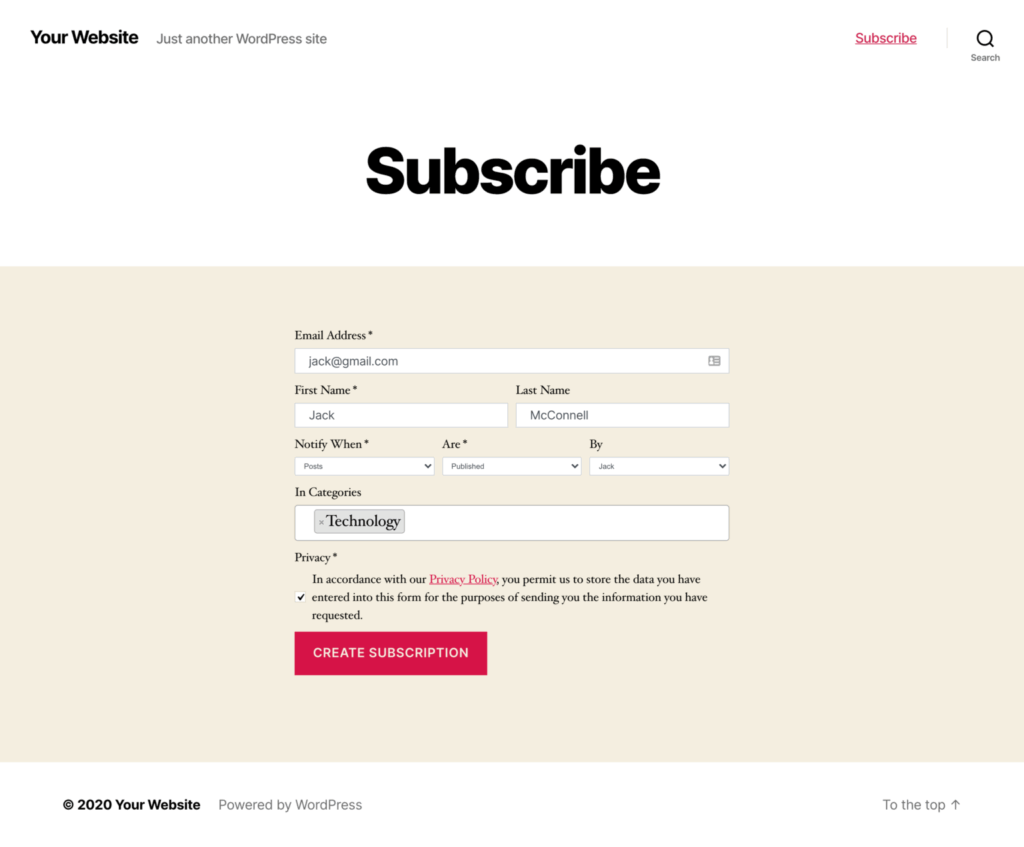
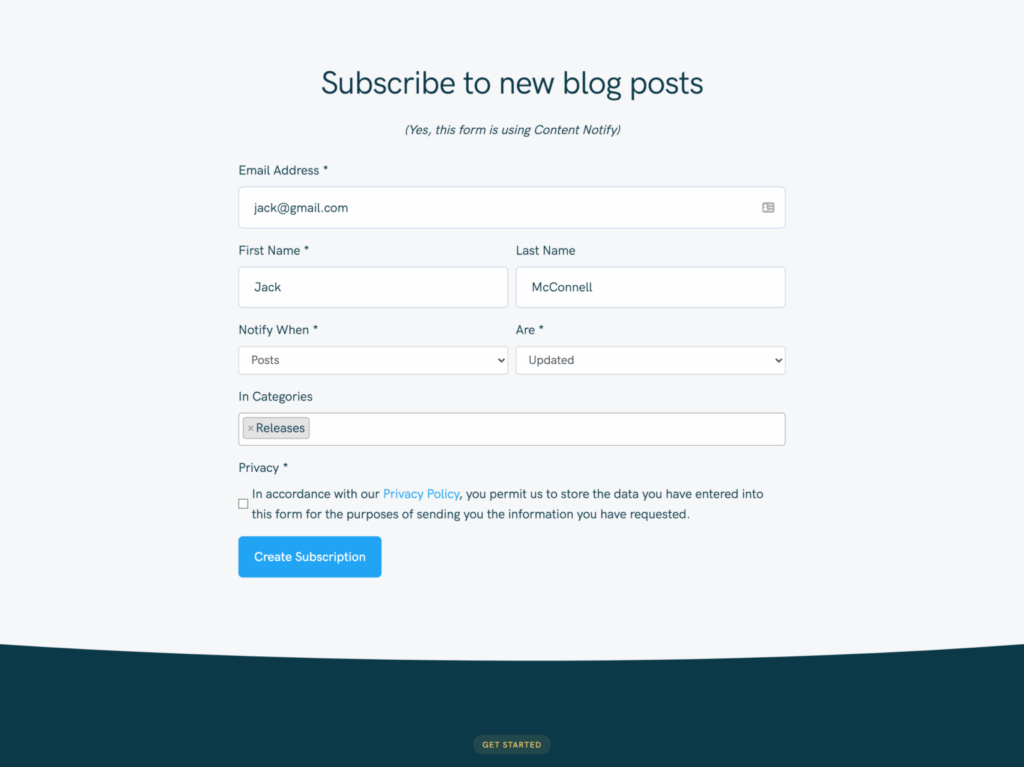
To add the Content Notify form in the new Block Editor (Gutenberg) or using the Classic Editor, simply use the shortcode: [cn_form]
You can also add the Content Notify form as either a Classic Widget, or a Block Widget. If using a block widget, it is recommended to use the ‘Shortcode’ block widget type.
Here is the full shortcode, in it’s default form:[cn_form user_fields="true" user_names="true" post_types="" post_id="" status="" authors="" taxonomies="" logic="OR" search="true" privacy_policy="true" captcha="false" submit_label="Create Subscription"]
Shortcode Parameters #
You can customise the output of the Content Notify form by adding some parameters to the shortcode:
- Use
user_fields="false"when a user is logged in and you don’t want to show the auto-populated Email Address, First Name, and Last Name fields in your form. If the user is logged out, these fields will show, even if this parameter is added to the shortcode. - User
user_names="false"if you don’t want the First Name or Last Name fields to show in the form. - Use
post_types=""with a comma separated list of post types that you want to limit the output of the Notify When field. Setting this to ‘auto’ or ‘false’ will detect the post type of the current post/page/custom post type, select it, and hide the Notify When field. Setting this to a single post type will hide the Notify When field but will show it when more than one post type is specified. - Use
post_id=""with the post ID (e.g. 2314) to limit subscriptions to updates for a specific post/page/custom post type. Setting this to ‘auto’ will detect the post ID for the post/page/custom post type that the form is embedded on and use that instead. Setting either option will hide the ‘post type’ and ‘status’ fields in the Content Notify form as only post/page/custom post type that have already been published can utilise this. - Use
status=""with a single or comma separated list of post statuses that you want to limit the output of the Are field. Only ‘publish’ and ‘update’ statuses are available at this time. Setting this field to ‘false’ will set the field to alert of both statuses. I.e. if a post is published OR updated. Setting this parameter will hide the the Are field. - Use
authors=""with a comma separated list of authors that you want to limit the output of the By field. Setting this to ‘false’ will hide the By field. Setting this to ‘auto’ will detect the author of the current post/page/custom post type, select it, and hide the By field. - Use
taxonomies=""with a comma separated list of taxonomies that you want to limit the output of the In field. Setting this to ‘false’ will hide the In field. Settings this to ‘auto’ will detect the first taxonomy associated with the post and then use the first term inside that taxonomy. Additionally, if this is used on an Archive page, such as a category/tag/taxonomy archive, it will select the term being used on that Archive page. - Use
logic=""to set the form to using and logic or or logic. Settings this to and will ensure an alert is only triggered when all taxonomies chosen have at least one matching term. Setting this to or will ensure an alert will be triggered when *any* taxonomy and any terms chosen are matched. When this shortcode parameter is excluded, the form’s logic defaults to or. - Use
search="true"to enable the keyword search field. This will allow users to trigger an alert based on search for a keyword in the title or content of a post/page/custom post type. Users can add multiple keywords by comma separating them, and use a plus sign ‘+’ to join words and search for them as phrases. Setting this to ‘false’ will hide the Keyword Search field. Each keyword or phrase will be searched for individually (using OR logic). - Use
privacy_policy="false"to hide the privacy policy checkbox for logged in users. - Use
captcha="true"to show a CAPTCHA field at the bottom of your Content Notify form. This then needs to be configured in Subscriptions > Settings > Security in the WordPress Admin. More detail on this can be found here. - Use
submit_label=""to change the text on the ‘Submit’ button. If not set, this will default to ‘Create Subscription’.
For example, you have Posts, Pages, Media, Movies, and Events as post types on your site but you only want users to be able to create subscriptions for Movies and Events. Just use this shortcode: [cn_form post_types="movies,events"]
Similarly, if you want to limit this further by only allowing users to create subscriptions for the Actors (custom taxonomy for Movies) and Local (custom taxonomy for Events), then use this shortcode: [cn_form post_types="movies,events" taxonomies="actors,local"]
The order of post types and taxonomies doesn’t matter – Content Notify will understand and work out which taxonomies are associated with which post types. Magic!
Adding to Template Files #
Should you wish to add the Content Notify form, including any shortcode parameters, to a theme template file, you can use this code:<?php echo apply_shortcodes( '[cn_form]' ); ?>
Form Errors #
On submission, and once the page has been reloaded, the page that features the shortcode will show any validation errors above the Content Notify form or will hide the form and display a success message when it is correctly submitted.
It is not recommended to put the Content Notify form into a modal popup as the page needs to refresh in order to submit and validate the entered data.
Privacy Policy Link #
The Privacy Policy link is automatically added from the page set in Settings > Privacy in the WordPress Admin.
Logged In Users #
Users that are logged in will benefit from their first name, last name, and email address being pre-populated in the form, providing that this information is available in their user account.
Styling the Form #
The Content Notify form uses standard Bootstrap classes so that it will integrate with the many, many themes that use Bootstrap as their underlying CSS framework.
The form also uses unique Content Notify classes so that you can style it further should you wish. The CSS classes available are:.cn-form {}
.cn-error {}
.cn-success {}
.cn-form {}
.cn-required-asterisk {}
.cn-email-address {}
.cn-names {}
.cn-first-name {}
.cn-last-name {}
.cn-when-are-by {}
.cn-when {}
.cn-are {}
.cn-by
.cn-taxonomies {}
.cn-taxonomy-row {}
.cn-taxonomy {}
.cn-privacy {}
.cn-submit {}
Styling Alerts #
Alerts are shown when a Content Notify form passes or fails validation, or a subscriber attempts to verify/delete their subscription. The CSS classes available are:
.cn-success {}
.cn-warning {}
.cn-error {}
.cn-info {}