Custom Search In Tablepress (CSTP) is a powerful add-on for TablePress plugin that allows you to create searchable tables quickly and easily. In this article, we will guide you through the process of creating a searchable table using CSTP.
Step 1: Creating a TablePress table #
To get started, you need to create a table using the TablePress plugin. If you are new to TablePress, you can find a detailed guide on creating tables in the TablePress documentation.
Step 2: Enabling custom search #
After you have created your table, navigate to the TablePress table page and scroll down to the Custom Search In Tablepress section. You will find an option to Enable custom search. Click on this option to enable the search feature.
Step 3: Selecting searchable columns #
Once you have enabled the custom search, you will see a list of columns that you can make searchable. Tick the checkbox next to the columns that you want to be searchable. For example, you might want visitors to be able to search by name or email.

Step 4: Adding the shortcode to a page or post #
After you have selected the columns you want to be searchable, copy the TablePress shortcode for your table. You can find the shortcode at the top of the TablePress table page.
Next, create a new page or post in WordPress and paste the shortcode into the content area.
Step 5: Previewing the page or post #
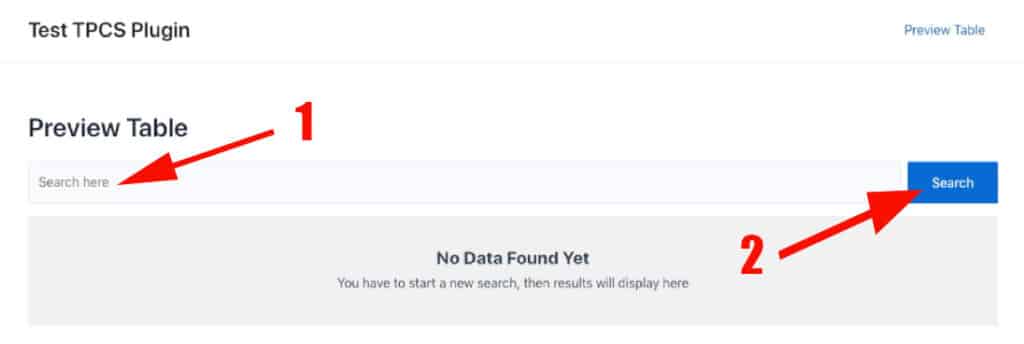
Preview the page or post to see how your searchable table looks. You should see a search field and search button.

Note #
Creating a searchable table using Custom Search In Tablepress is a simple process that can make your tables more user-friendly and easier to navigate. By following these steps, you can create a searchable table in minutes and provide a better user experience for your visitors.

